Showing posts with label Section 35. Show all posts

Sunday, November 13, 2016

Section: 35
Hours: 7

I bolted the canopy cradle assemblies in place.

Then I attached the shock struts to the cradle arms.

Then I installed and bolted up the canopy release mechanism.  

When the release mechanism is in full closed position, the pin doesn't quite span the opening between the sides of the cradle arm. When the mechanism is moved the other direction, the pin drops out of the hole. It doesn't seem like it will take much to release the canopy...

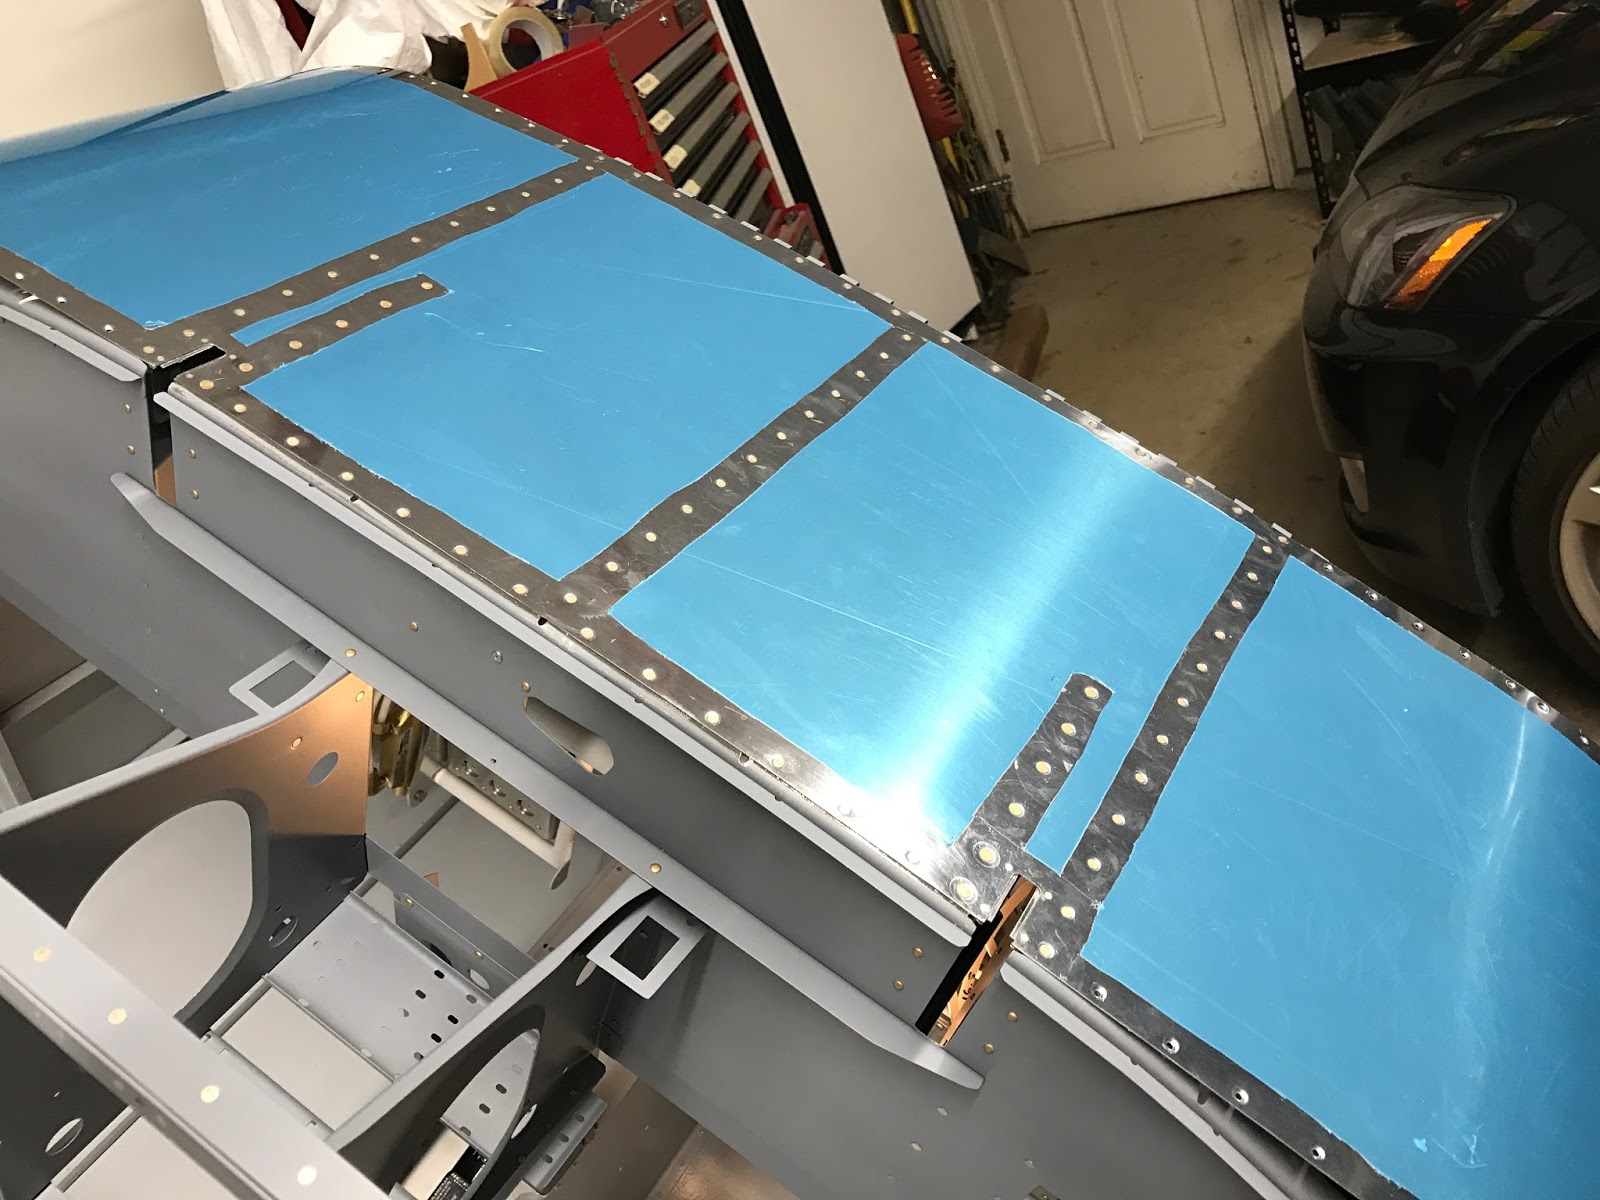
After that I mixed up some more ProSeal and riveted the right side of the upper skin to the structure. It took several hours to set the rivets because it was so difficult to reach them with the bucking bar. I decided to leave the left side riveting until I can get a helper. There's no access hole in the bulkhead on the right side and my arms are not long enough.

Since I had the rudder cable links painted I installed them.

I finished up the day pulling the rivets for the freshly primed rod end and elevator push rod tube.


Saturday, November 12, 2016

Section: 35
Hours: 6

I started the day by assembling the canopy release mechanism.

Then I counter sank the holes in the upper forward longeron. The cage of the counter sink ran into the lower skin so I made a spacer with a hole in it to support the cage. The spacer is the same thickness as the lower skin so the cage nicely rests perpendicular to the longeron.


I spent the rest of the day riveting the central section of the upper skin. The back edge of the skin is sealed with ProSeal so it was a messy job. It was also rather difficult reaching with the bucking bar for the rivets on that back edge and the internal ribs. It was really slow going...

I was able to use the squeezer to set the rivets in the forward edge and these rivets went really quickly.

Friday, November 11, 2016

Section: 35
Hours: 5

Today was a painting day. I primed all the parts I had prepped over the last couple days. I also primed and painted a couple more steel parts using the Rust-oleum.

I also primed the bottom wing skins today. I hope to close up the wings in the near future and it will be nice to have the skins ready to go.

Thursday, November 10, 2016

Section: 35
Hours: 4

Woody and I washed and acid etched parts today. Here's Woody watching the parts dry.

The evenings have been damp lately so I brought all the parts into the garage to finish drying.

Tuesday, November 8, 2016

Section: 35
Hours: 4

Yesterday UPS delivered the aluminum tubing I ordered from Aircraft Spruce and Sterling from Van's tech support advised me to use use the canopy release parts as provided but move the bolt hole in to provide sufficient hole edge distance from the inner tube. Today I assembled the canopy release parts and drilled the bolt hole. Then I cut the tubing for the release arms to length and scribed a line the length of each arm to establish the alignment for the pin holes. I then drilled the holes on the scribed line at both ends of the arms. Slots are required at both ends perpendicular to the pin holes. I used the bandsaw to cut an initial thin slot by setting the fence 1/2 the diameter from the blade so the blade would cut through the middle of the tubing. I established the orientation by putting a drill bit through the pin hole and holding the bit parallel to the bandsaw table as I pushed the other end of the tube into the bandsaw blade.

I widened out the slots by progressively moving the bandsaw fence out. I did the final slot fit using a flat file to make a snug, non binding fit over the lugs and end pins.


Monday, November 7, 2016

Section: 35
Hours: 4

Today I fitted the hinges to the upper fuselage skin. You start by cutting a couple hinge sections to length, scribing an alignment mark and drilling an initial index hole to align the hinges to the skin. Then you remove a couple clecos from the skin, cleco the hinge through the index hole and start working from the center out drilling holes in the hinge to match the holes in the skin. I carefully kept the alignment scribe line on the hinge aligned with the skin edge by using cleco clamps on either side of the hole being drilled. It's an exacting tedious task but looks great when it's done!

After I completed drilling all the holes, I removed all the clecos and pulled the shims and hinges off of the fuselage. Then I dimpled the shims and countersank all the holes in the hinges.

Sunday, November 6, 2016

Section: 35
Hours: 4

I started to assemble the top skin to the forward upper fuselage today.

The upper portion of the firewall tilts forward slightly which wasn't so apparent until I clecoed the skin in place. I discovered that the rotisserie mount was interfering with the tilted part of the fire wall. I spent the rest of the day man handling the fuselage off the rotisserie stand onto saw horses and then modified the mount to accommodate the firewall slant. The fuselage is a lot heavier than the last time I had to move it around using saw horses.

Here's the modified stand back in place ready to continue work on the fuselage- tomorrow...

Friday, November 4, 2016

Section: 35
Hours: 4

I worked on the canopy release today, but ran into a couple problems. The parts fit together, but the inner tube ended up a short of the end of the outer tube. I was concerned if I drilled the mating hole where shown on the drawings the edge of the hole would be too close to the end of the inner tube. I documented the problem and sent of a note to Van's tech support asking what to do.

Then I spent a couple hours searching the garage for the .375" tubing needed to fabricate the arms for the release mechanism. I never did find it so I ordered 2 feet of 6061T6 Aluminum tube 3/8x.058 from Aircraft Spruce.

Another frustrating day...

Thursday, November 3, 2016

Section: 35
Hours: 4

Today I riveted together the instrument panel parts and then installed it in the fuselage.

I also installed the gas shock struts for the canopy.

Wednesday, November 2, 2016

Section: 34
Hours: 1

I cleaned out the insides of the flap torque tubes by running scotch brite pads through and then taped up the holes and ends of the tubes. I decided to use Rust-oleum clean metal primer for the insides of these tubes. I sprayed a heavy coat inside the tubes and rolled the tubes to evenly spread the primer and then set the tubes on end to drain the excess paint.

Section: 35
Hours: 4

I spent the rest of the day installing the upper forward fuselage assembly.

The bulkheads rivet to the firewall.

Here's the attachment to the upper longeron.


Monday, September 26, 2016

Section: 35
Hours: 5

I finished assembling the forward upper fuselage parts.

Here's the wiring channel with the nut plates applied.

This assembly supports the canopy and the instrument panel.


Next I riveted the upper longeron assembly to the fuselage. The plans specify that you seal the joint between the side skin and the longeron, I assume to make it water tight. You don't want water leaking in while flying in the clouds. I started by masking off the side skin and applied a thick bead of ProSeal between the side skin and the longeron. Then I squished the upper longeron assembly down on the ProSeal and clecoed it in place. I shot the pull rivets using the pneumatic pull rivet gun and then cleaned up the excess ProSeal and removed the masking tape. Sorry I don't have pics of those intermediate steps- my hands were sticky from ProSeal. Here is the final result.

I'm glad I purchased the pneumatic rivet puller- it made this task much easier.

Sunday, September 25, 2016

Section: 35
Hours: 3

This afternoon I started riveting together the upper forward fuselage parts.

This bracket required some tricky riveting. I was able to use the squeezer for most, but used the rivet gun for a couple that I couldn't reach. There are also a couple pull rivets.

It's hard to believe the canopy is entirely supported by these bulk heads, but I'm sure the structure will be pretty stout by the time the outside skin is applied.

Saturday, September 24, 2016

Section: 35
Hours: 4

This morning I acid etched and then primed the forward fuselage parts.


Section: 42
Hours: 4

This afternoon I riveted together the nut plates and doublers to the floor covers. I also riveted together the flap motor cover assembly. Here they are laid out in the cabin.

Monday, September 12, 2016

Section: 35
Hours: 2

I've been researching avionics for some time. Now that I have some panel structure in place, I couldn't resist trying out some visual aids. I printed out full size pictures of the gear I'm interested in and mounted them on mockup cardboard instrument panel sections. I'm looking at installing Garmin radios and displays. The center stack will have a GMC 307 auto pilot controller on top, a GTN-650 GPS/COM/NAV and a GMA 245 audio panel. The left panel will have a G3X 10" touch display and a small G5 attitude backup display. I may mount an iPad on the right side so the passenger has something to fiddle with. Behind the panel I'm planning to install a GTR 20 backup com radio and a GTX 45R ADSB/transponder. There's still lots more to figure out...

Section: 32
Hours: 3

This afternoon I started the task of riveting the baggage floors in. There sure are a lot of pull rivets in this section. Tomorrow I'm going to pick up a pneumatic pull rivet tool at Harbor Freight before I wreck my hands. I don't want to spend the next couple weeks recovering from RSI.

Sunday, September 11, 2016

Section: 35
Hours: 8

I made good progress prepping more parts for the forward upper fuselage.

I finished match drilling the side rail decks and removed them to countersink the rails. At the suggestion from other builders, I taped off the gap between the side skin and the rail channel to prevent chips from accumulating in the gap there.

Lots of chips from counter sink drilling.

Here's the dimpled rail caps clecoed onto the counter sunk side rails for test fitting.

I now have most of the forward fuselage assembly prepped and trial fitted!

Here's a side view of the control panel and sub panel bulkheads and reinforcements. Everything fits together nicely- all the holes line up (I must have been reading the instructions correctly today :-)

Saturday, September 10, 2016

Section: 33
Hours: 2

I finished up prepping parts for chapter 33. I'm going to hold off on priming until I get a new spray gun and the paint that I'm going to use for the cabin.

Section: 35
Hours: 4
I started work on prepping the upper forward fuselage parts. More drill, debur, polish, etc.


I fitted the cabin side rail top and started match drilling it in place. The fit seems to be very good so far.